
Understanding Type2 Portable EV Charger and Vehicle Compatibility
The Type2 portable EV charger, often called the Mennekes connector, works with around 90% of electric cars in Europe because of its seven pin setup that meets IEC 62196-2 standards. While the older Type1 (J1772) connector can only handle single phase charging at max 7.4 kW, the Type2 version handles three phase AC power and reaches speeds of up to 43 kW. That kind of speed is great for both plug in hybrids and fully electric vehicles like the Renault ZOE and Tesla Model S which need faster charging times. After becoming the official EU standard back in 2013, Type2 connectors have pretty much taken over everywhere from Europe to Australia and even some spots in Asia where they're slowly replacing other types.
To confirm your EV is compatible with a Type2 charger:
- Check the owner's manual for "IEC 62196 Type2" or "Mennekes" designation
- Inspect the charging port visually—a rectangular inlet with seven asymmetrically arranged pins indicates Type2 support
- Use compatibility tools provided by major charging networks if uncertain
Most modern EVs like the BMW i3 and Volkswagen ID.4 have native Type2 inlets, though older models may require adapters.
| Feature | Type2 Portable Charger | Type1 (J1772) Charger |
|---|---|---|
| Phases Supported | 3-phase (up to 43 kW) | 1-phase (up to 7.4 kW) |
| Common Regions | Europe, Australia, Asia | North America, Japan |
| Locking Mechanism | Automatic latch | Manual latch |
Step-by-Step Guide to Connecting a Type2 Portable EV Charger
Locating the Charging Port on Your Electric Vehicle
EV charging ports are typically located on the front fender, rear quarter panel, or beneath a side emblem. Hybrid models sometimes integrate the port behind the fuel flap. Refer to your owner's manual for precise location and ensure the inlet matches the Type2 7-pin configuration before connecting.
Preparing the Type2 Portable EV Charger for Safe Connection
Inspect the cable for cuts, kinks, or exposed wiring. Confirm that your power outlet aligns with the charger’s plug type—BS 1363 (UK) or CEE 7/5 Schuko (EU). Fully uncoil the cable to prevent overheating during use, and verify the control box shows no error codes or warning lights.
Aligning and Securing the Type 2 Connector to the Vehicle Inlet
Hold the connector vertically, aligning the guide notch with the port’s rail. Push straight in firmly until you hear an audible click, signaling the automatic latch has engaged. Do not force or angle the plug, as misalignment can damage internal pins.
Verifying Physical Connection Before Starting the Charge
Gently tug the connector to ensure it’s securely seated. Then check your vehicle’s dashboard: most EVs display a charging icon or begin updating projected range within 15 seconds. If no response occurs, disconnect and repeat the connection process, ensuring full insertion and clean contacts.
How Charging Starts: Pilot Signal Communication in Type2 Chargers
Role of Control Pilot and Proximity Pilot in Initiating Charge
Type 2 chargers work with two main signals for communication the Control Pilot (CP) and Proximity Pilot (PP). These signals help start up the charging process safely and keep everything running smoothly during charging sessions. Looking at the Control Pilot specifically, it sends out a 1 kHz Pulse Width Modulation (PWM) signal that allows information exchange between the actual charger unit and the electric vehicle itself. This helps determine things like what's the highest amount of current available and whether both sides are prepared for charging. When we see a +6V reading on the CP signal, that basically tells us the car is all set to begin charging. But if there's a +9V level instead, it means the vehicle is physically connected to the charger but hasn't started drawing power yet according to findings from the IEC 61851 standard document on EV charging protocols.
The PP ensures physical safety by detecting resistance changes in the cable, confirming proper locking and cable integrity. It prevents power delivery if the connection is incomplete or unstable. Together, these systems enable real-time coordination, reducing risks such as arcing or electrical overload.
| CP Signal Voltage | Charging State | Description |
|---|---|---|
| +12V | EV Not Connected | Charger detects no vehicle |
| +9V | Connected, Not Ready | Vehicle linked but not requesting charge |
| +6V | Ready (No Ventilation Needed) | Charging begins |
| +3V | Ready (Ventilation Required) | Requires airflow for battery safety |
Why a Connected Type2 Portable EV Charger Might Not Start Charging
Even with a secure physical connection, charging may not start due to:
- Corroded or dirty CP pins, which disrupt PWM signal accuracy
- PP resistance errors from debris or misalignment, falsely indicating an unlocked connector
- Cold weather delays: In sub-zero temperatures, signal handshake can take 10—15 seconds longer, as observed in Nordic EV trials (2023)
Allow up to 30 seconds in cold conditions before troubleshooting, and routinely inspect pins for dirt or wear.
Monitoring the Charging Process and Indicator Signals
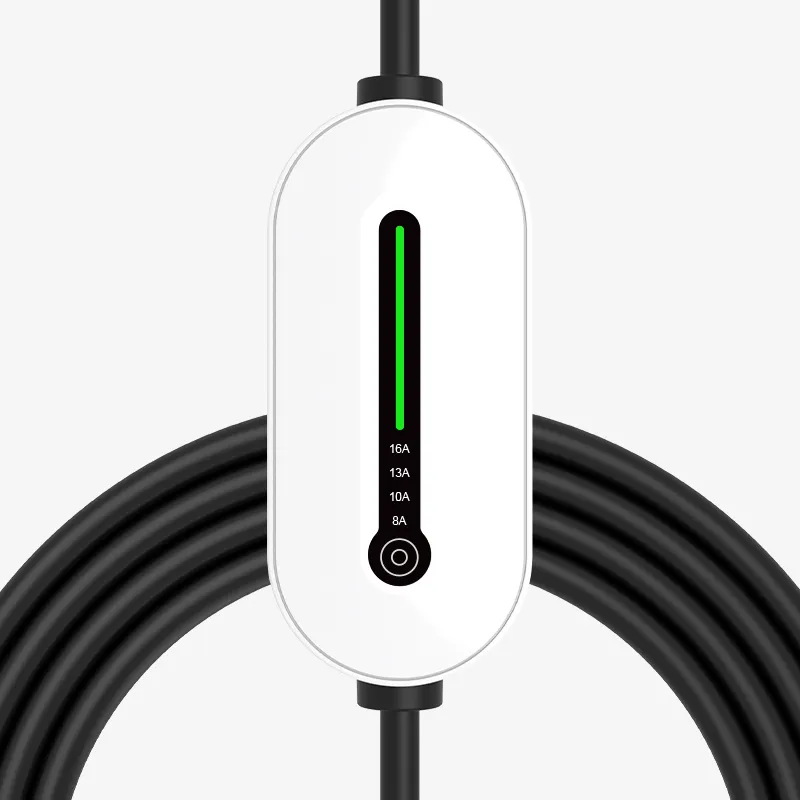
Interpreting LED Color Codes on Your Type2 Portable EV Charger
The LED lights on chargers give immediate info about what's happening during the charge process. When the green stays solid, that generally means power is flowing into the car right now. If the amber light starts flashing, it usually points to the charger talking back and forth with the vehicle's battery system. Red signals problems most of the time, like when things get too hot or there's something wrong with the voltage levels. A recent look at electric vehicle charging from 2023 showed that these colored lights cut down mistakes by around two thirds compared to reading small text screens. Keep in mind though, different manufacturers have their own color codes sometimes. Some companies might use blue to signal a full charge, or fast blinking patterns for warning about grounding issues. Always check the manual that came with your particular charging unit to know exactly what each light actually means for your setup.
Checking Vehicle Dashboard for Active Charging Confirmation
Once connected, check if the car is actually charging by looking at the dashboard display. Nearly all electric vehicles will show some kind of battery graphic with rising percentages as it charges. A lot of them go further too, displaying live info such as how fast it's charging in kilowatts and roughly how long until fully charged. Some cars even make a sound when everything starts working properly or light up the charging port area so drivers know something's happening. Now here's what to do if things aren't going right: sometimes the dashboard looks dead but the charger itself has a green light. When this happens, try pulling out the charging cable completely and plugging it back in again. This often fixes connection issues between the vehicle and the charging station.
Safety and Troubleshooting Tips for Type2 Portable EV Charger Use
Essential Safety Precautions When Charging in Wet or Outdoor Conditions
Before taking that Type2 portable EV charger outside, make sure it comes with at least an IP54 rating against dust and moisture. When raining, find some shelter to charge in and always wipe down those connectors properly before putting them away. Keep cables lifted off damp ground whenever possible and absolutely avoid using any gear that looks damaged. Some studies point out that around two thirds of all weather-related problems happen because people didn't protect their equipment enough from getting wet.
Avoiding Cable Damage and Ensuring Proper Handling During Connection
Store the cable loosely coiled to avoid internal wire stress and prevent sharp bends near connectors. When disconnecting, grasp the plug housing instead of pulling the cord—yanking increases failure risk fourfold, according to hardware analyses. Use strain relief loops when routing cables around tight edges to extend lifespan.
Troubleshooting Common Issues: No Latch, No Charge Start, and Cold Weather Effects
When the connector won't latch properly, check the inlet area for any dirt or grime first. Give it a firm push until that satisfying click sound happens. If charging doesn't start at all, give both the charger unit and car system a reset attempt. Cold temperatures really slow things down too. Most electric vehicles come with an app feature that lets owners warm up batteries ahead of time, which helps fight off that usual 20 to 35 percent drop in charge rate during winter months. Keeping those connection points clean every month goes a long way toward avoiding problems. We've seen from experience that regular upkeep stops about four out of five connection troubles before they even become major headaches.
Frequently Asked Questions (FAQ)
What is a Type2 portable EV charger?
A Type2 portable EV charger is a device that connects to electric vehicles using a Mennekes connector with a seven-pin setup according to IEC 62196-2 standards. It allows high-speed charging with three-phase AC power, up to 43 kW.
How can I check if my EV is compatible with a Type2 charger?
To check compatibility, refer to your electric vehicle's owner's manual for "IEC 62196 Type2" or "Mennekes" designation or visually inspect the charging port for a rectangle inlet with seven asymmetrically arranged pins.
Why might my Type2 charger not start charging?
Potential reasons include corroded or dirty Control Pilot pins, Proximity Pilot resistance errors from debris or misalignment, or cold weather delays that extend the signal handshake.
Table of Contents
- Understanding Type2 Portable EV Charger and Vehicle Compatibility
- Step-by-Step Guide to Connecting a Type2 Portable EV Charger
- How Charging Starts: Pilot Signal Communication in Type2 Chargers
- Monitoring the Charging Process and Indicator Signals
- Safety and Troubleshooting Tips for Type2 Portable EV Charger Use
- Frequently Asked Questions (FAQ)